Equipment:
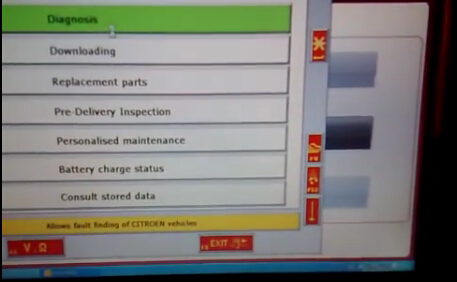
Lexia 3 V48 Diagbox V7.57 diagnostic interface
Install Lexia Diagbox software
Select Citroen in Brand selection menu
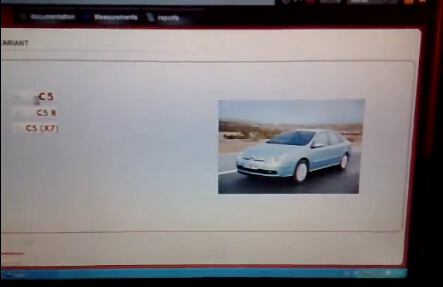
Select vehicle model: C5->C5
Click Tick mark to confirm ACTIVATION notice
Select application as LEXIA
Enter Activation code to activate
Back to APPLICATION menu and select second option
Select Diagnosis
Select Test by function
Switch off the ignition and switch it on again
Select driving aids (4th option)
Pull down the list and select road holding (ABS…)
The system is searching for the vehicle configuration
There are four options under road holding menu:
BSI
Instrument panel
Injection
Anti-lock brake system
Change Instrument panel, Injection and Anti-lock brake system to YES by click corresponding icons
Build communication with ECU
Accept Ecu ESP-MK60 Validate to continue
Accept the system pop-up message
Select “Bleeding” in next interface
Accept windows notice and follow the screen instructions
Bleeding Citroen C5 brake system procedure is complete
Lexia 3 PP2000 is popular auto diagnostic tool supporting most Citroen and Peugeot vehicles.The Newest Software is Lexia3 V47 PP2000 V25.Lexia-3 PP2000 has powerful function and support multi-languages.
Friday, March 18, 2016
How to load Lexia 3 Peugeot Planet PP2000 diagnostic software to car ECU
Diagnostic tool needs:
Lexia 3 lexia-3 V48 diagnostic interface with Peugeot Planet PP2000 V25 diagnostic software
1.After well install and activate lexia 3 software, open and run Peugeot Planet Office on the desktop
2.Click F1 to key to cancel when the system pops out update warning message
3.Select vehicle model, here takes an example of 306R
4. Select application as Peugeot Planet 2000
5. Enter 4-digit Build code in Entering the vehicle information interface
NOTE:
Build Cod, also called RP or ORGA number for Citroens, is built in PSA Group factories. This can be used to determine the exact age of the vehicle (as opposed to date from registration info, which is all that RAC vehicle info etc. have to go on), as well as parts suitability - for instance where there was a changeover or variation during production you may see references such as “From O 8161” in the parts system. This is normally a 4 digit long number and identifies where the vehicle came in the production run.
To find the Build Code of vehicle, you need to look under the bonnet:
1) Earlier cars, the Build Code is painted (probably in green) onto the driver's side suspension turret. It is a 6 digit number, the first 4 digits of which are your Build Code.
2) In later cars the Build Code can be found on a small white sticker on the passenger side bulkhead.
If the build code is 09704 88 1 0759, then you put the number in Planet is 0970.
6. Then select ECU configuration and services
7. Select Global test
8. Switch on the ignition.
Connect the adaptor part number AC911684 ro the USB communication card (Peugeot Plant Interface)
Connect the portable to the test connector C001
9. Peugeot Planet PP2000 is successfully loaded to car ECU.
Lexia 3 lexia-3 V48 diagnostic interface with Peugeot Planet PP2000 V25 diagnostic software
1.After well install and activate lexia 3 software, open and run Peugeot Planet Office on the desktop
2.Click F1 to key to cancel when the system pops out update warning message
3.Select vehicle model, here takes an example of 306R
4. Select application as Peugeot Planet 2000
5. Enter 4-digit Build code in Entering the vehicle information interface
NOTE:
Build Cod, also called RP or ORGA number for Citroens, is built in PSA Group factories. This can be used to determine the exact age of the vehicle (as opposed to date from registration info, which is all that RAC vehicle info etc. have to go on), as well as parts suitability - for instance where there was a changeover or variation during production you may see references such as “From O 8161” in the parts system. This is normally a 4 digit long number and identifies where the vehicle came in the production run.
To find the Build Code of vehicle, you need to look under the bonnet:
1) Earlier cars, the Build Code is painted (probably in green) onto the driver's side suspension turret. It is a 6 digit number, the first 4 digits of which are your Build Code.
2) In later cars the Build Code can be found on a small white sticker on the passenger side bulkhead.
If the build code is 09704 88 1 0759, then you put the number in Planet is 0970.
6. Then select ECU configuration and services
7. Select Global test
8. Switch on the ignition.
Connect the adaptor part number AC911684 ro the USB communication card (Peugeot Plant Interface)
Connect the portable to the test connector C001
9. Peugeot Planet PP2000 is successfully loaded to car ECU.
Thursday, March 17, 2016
How to activate Peugeot cruise control with Lexia 3 PP2000 diagnostic tool
Please check that your vehicle can be retrofitted with cruise control before purchasing any parts or paying to activate cruise control in your ECU. Cruise control will not function unless the foot pedal, control stalk and master on/off switches are all present, adjusted correctly and working normally.
Tool needs:
Lexia 3 V48 Peugeot Planet PP2000 V25 diagnostic tool
Vehicle model example:
Peugeot 406 HDi 90 2001
Instructions:
1. Install and activate lexia 3 PP2000 software. Select vehicle model. Select the application as PEUGEOT PLANET 2000.
2. The system will identify and configure vehicle information. Then select “ECU configuration and services”
3. Select “Test by ECU”
4. Select “Engine/automatic gearbox”
5. Select “Petrol” or “Diesel” according to your vehicle. Here select “Diesel”
6. Select the correct ECU for your vehicle. Variant can usually be identified from VIN code on left.
7. Switch on the ignition. Connect the portable to the test connector C001. Then the system is identifying and reading of the ECU in progress.
Select “Configuration” option in Carry out the tests menu
8. Select “Cruise Control” among various ECU modules and change this option to “present (activated)”
9. Click “OK” to validate.
10. Click “Configure” button to save settings. Wait patiently for a few seconds don’t click anything else.
11. Click “Yes” for saloon and “No” for estate car
Click OK to validate
Open “Configuration” again to check that the changes have been recorded
Exit the program if settings have been saved
If you want to know more info,pls visit:
http://www.uobdii.com/wholesale/lexia-citroen-peugeot-diagnostic-pp2000-with-diagbox-software.html
Tool needs:
Lexia 3 V48 Peugeot Planet PP2000 V25 diagnostic tool
Vehicle model example:
Peugeot 406 HDi 90 2001
Instructions:
1. Install and activate lexia 3 PP2000 software. Select vehicle model. Select the application as PEUGEOT PLANET 2000.
2. The system will identify and configure vehicle information. Then select “ECU configuration and services”
3. Select “Test by ECU”
4. Select “Engine/automatic gearbox”
5. Select “Petrol” or “Diesel” according to your vehicle. Here select “Diesel”
6. Select the correct ECU for your vehicle. Variant can usually be identified from VIN code on left.
7. Switch on the ignition. Connect the portable to the test connector C001. Then the system is identifying and reading of the ECU in progress.
Select “Configuration” option in Carry out the tests menu
8. Select “Cruise Control” among various ECU modules and change this option to “present (activated)”
9. Click “OK” to validate.
10. Click “Configure” button to save settings. Wait patiently for a few seconds don’t click anything else.
11. Click “Yes” for saloon and “No” for estate car
Click OK to validate
Open “Configuration” again to check that the changes have been recorded
Exit the program if settings have been saved
If you want to know more info,pls visit:
http://www.uobdii.com/wholesale/lexia-citroen-peugeot-diagnostic-pp2000-with-diagbox-software.html
How to program Peugeot new key with Lexia3 PP2000 diagnostic tool
Equipment:
Lexia3 V48 PP2000 V25 diagnostic interface
NOTE:
PIN Code is required during key programming procedure. Record your vehicle PIN code first.
V156 Renault CAN Clip torrent Free Download:
http://blog.uobdii.com/v156-renault-can-clip-torrent-free-download/
Instruction:
1.Install and activate Lexia 3 PP2000 V25 diagnostic software
2.Select vehicle model 307 and wait until the well communication built
3.Check the entering vehicle information
4.Select the application as Peugeot Plant 2000 and confirm it
5.Select test by ECU
6.Select Built-in systems interface
7.The system is reading the ECU in progress, follow and accept the windows prompts.
8.Select Learning option under Carry out the tests menu display
9. Select Programming of keys
10. The system will display key programming procedure when activation process is complete. Confirm to continue.
11. Confirm Unlocking the E.C.U program
12. Manually enter the Confidential code (PIN Code)
13. The system is verifying the PIN code. If the code is correct, the built-in systems interface is ready for programming of keys.
14. Enter the key number to be learnt. The number of keys to be programmed cannot exceed 5.
15. Follow the screen prompt to switch off the ignition
16. Then switch ignition to ON within 15 s.
17. Key programmed, switch off the ignition and take out the key
18. Switch ignition ON again and insert the next key in the ignition. Repeat the key programming procedure to program another key. When complete programming, the system will display keys that are programmed.
19. Follow the screen instructions. Check the handbrake is on. For an automatic gearbox, check the gear level is in position “P”. For a manual gearbox, check that the gear level is in neutral
20. Follow the re-synchronies the HF remote controls procedure to operate until the “End of key programming procedure” notice displays. Exit the program.
Lexia3 V48 PP2000 V25 diagnostic interface
NOTE:
PIN Code is required during key programming procedure. Record your vehicle PIN code first.
V156 Renault CAN Clip torrent Free Download:
http://blog.uobdii.com/v156-renault-can-clip-torrent-free-download/
Instruction:
1.Install and activate Lexia 3 PP2000 V25 diagnostic software
2.Select vehicle model 307 and wait until the well communication built
3.Check the entering vehicle information
4.Select the application as Peugeot Plant 2000 and confirm it
5.Select test by ECU
6.Select Built-in systems interface
7.The system is reading the ECU in progress, follow and accept the windows prompts.
8.Select Learning option under Carry out the tests menu display
9. Select Programming of keys
10. The system will display key programming procedure when activation process is complete. Confirm to continue.
11. Confirm Unlocking the E.C.U program
12. Manually enter the Confidential code (PIN Code)
13. The system is verifying the PIN code. If the code is correct, the built-in systems interface is ready for programming of keys.
14. Enter the key number to be learnt. The number of keys to be programmed cannot exceed 5.
15. Follow the screen prompt to switch off the ignition
16. Then switch ignition to ON within 15 s.
17. Key programmed, switch off the ignition and take out the key
18. Switch ignition ON again and insert the next key in the ignition. Repeat the key programming procedure to program another key. When complete programming, the system will display keys that are programmed.
19. Follow the screen instructions. Check the handbrake is on. For an automatic gearbox, check the gear level is in position “P”. For a manual gearbox, check that the gear level is in neutral
20. Follow the re-synchronies the HF remote controls procedure to operate until the “End of key programming procedure” notice displays. Exit the program.
Wednesday, March 16, 2016
How to install Diagbox V7.57 for Lexia-3 PP2000 Citroen and Peugeot
The Diagbox for Lexia 3 V48 PP2000 V25 Citroen and Peugeot diagnostic has newly upgraded to latest V7.57. Here is the step-by-step Daigbox V7.57 installation instruction:
ⅠInstall DiagBox V7.57 setup1
1)Insert CD software into the computer
2)Open Diagbox V7.57 (E:) CD
3)Select and open setup1
4) After loading setup. Select system language
5) Accept SPTD setup license agreement.
6) Restart the computer
7) Select language again
8) Accept license agreement
9) Save file to a certain folder and click next
10) Select Alcohol 52% file on the desktop, select Add image from my computer Diagbox V7,57 and mount on Setup BDV0702
11) Setup is installing. Select language again.
Ⅱ Install DaigBox-setup
12) Open Diagbox.V07.02(F:) and open Diagbox-setup driver
13) Select language. Installing setup driver will generate three folders on the desktop, EmalDiag, WEBEX and Diagbox. Accept the windows security alert
14) Diagbox software is loading.
Ⅲ Activate Lexia 3 DiagBox software
15) The system will prompt ACTIVATION message, click manually activation (3rd option)
16) Check your customer code and correct it if it is not correct
17) Please wait until the software complete installation. Usually it will take about 12 minutes. The waiting time depends on your computer configuration
18) After complete install, click Yes to continue When come to the PARAMETER program, fill in the Dealership Information and Technician information , including Company name, Address, Post Code etc
19) Click No when the system asks for new update. Select Citroen or Peugeot band in BRAND SELECTION program and then select detail vehicle model to check vehicle information.
20) Close the activation program. Unlock windows security alert
Ⅳ Update DiagBox to V7.57
You can not directly update DiagBox to V7.57. You have first update to V7.44, than update V7.44 to V7.49, then update V7.49 from V7.57.
21) Open DiagBox shortcut on the desktop, the software is updating to V7.02
22) When the system asks for an update, click no. Check the vehicle information again. Close the program.
23) Open DiagBox V7.57(E:) CD software on My computer. Select setup3 update V7.02 to V7.57 file.
24) Select DiagBox Update V7.xx to V7.44, select language, accept windows prompts
25) Enter the setup password, scary01
26) After update complete, select no to restart the computer now but restart the computer later.
Back to setup3 folder, select Update V7.44 to V7.49, follow the operation of updating DiagBox V7.xx to V7.44.
27) Select DaigBox Update V7.49 t0 V7.57. Follow the same update operation as previous update.
28) After update Diagbox from V7.57, open DiagBox shortcut on the desktop
29) Here is the new DiagBox software program of V7.57
30) Please connect the device to the car, then use the short USB cable to connect with the computer, then it will prompt to install driver.
31) Select the application as LEXIA
32) Enter missing information
33) Come to the main diagnosis function, select the function you want to project.
ⅠInstall DiagBox V7.57 setup1
1)Insert CD software into the computer
2)Open Diagbox V7.57 (E:) CD
3)Select and open setup1
4) After loading setup. Select system language
5) Accept SPTD setup license agreement.
6) Restart the computer
10) Select Alcohol 52% file on the desktop, select Add image from my computer Diagbox V7,57 and mount on Setup BDV0702
Ⅱ Install DaigBox-setup
12) Open Diagbox.V07.02(F:) and open Diagbox-setup driver
13) Select language. Installing setup driver will generate three folders on the desktop, EmalDiag, WEBEX and Diagbox. Accept the windows security alert
14) Diagbox software is loading.
Ⅲ Activate Lexia 3 DiagBox software
15) The system will prompt ACTIVATION message, click manually activation (3rd option)
16) Check your customer code and correct it if it is not correct
17) Please wait until the software complete installation. Usually it will take about 12 minutes. The waiting time depends on your computer configuration
18) After complete install, click Yes to continue When come to the PARAMETER program, fill in the Dealership Information and Technician information , including Company name, Address, Post Code etc
20) Close the activation program. Unlock windows security alert
Ⅳ Update DiagBox to V7.57
You can not directly update DiagBox to V7.57. You have first update to V7.44, than update V7.44 to V7.49, then update V7.49 from V7.57.
21) Open DiagBox shortcut on the desktop, the software is updating to V7.02
22) When the system asks for an update, click no. Check the vehicle information again. Close the program.
23) Open DiagBox V7.57(E:) CD software on My computer. Select setup3 update V7.02 to V7.57 file.
24) Select DiagBox Update V7.xx to V7.44, select language, accept windows prompts
25) Enter the setup password, scary01
26) After update complete, select no to restart the computer now but restart the computer later.
Back to setup3 folder, select Update V7.44 to V7.49, follow the operation of updating DiagBox V7.xx to V7.44.
27) Select DaigBox Update V7.49 t0 V7.57. Follow the same update operation as previous update.
28) After update Diagbox from V7.57, open DiagBox shortcut on the desktop
29) Here is the new DiagBox software program of V7.57
30) Please connect the device to the car, then use the short USB cable to connect with the computer, then it will prompt to install driver.
31) Select the application as LEXIA
32) Enter missing information
33) Come to the main diagnosis function, select the function you want to project.
Subscribe to:
Posts (Atom)