Having been playing around lexia 3 diagnostic tool for PSA groups, I have tested successfully on lots of Citroens and Peugeots. Since there is no detail function and vehicle list on the webpage (as list where mine from), I should be first one.
My Lexia 3 PP2000 OBDⅡtool: $79 from UOBD2
Package includes:
Lexia 3 (full adaptors) and 30 PIN connector
PSA: Lexia -3 protocol K+CAN, Citroen, Peugeot 1995-2010
PSA: Lexia -3 30 PIN connector before 1996
Software version:
Lexia 3 V45
PP2000 V25
Diagbox V5.75
Lexia 3 diagnostic tool function achieves:
1. Read/ Erase trouble codes
Display all stored and pending faults codes with full description, e.g “Rail pressure-too low pressure”
Program support report or copy to clipboard
2. Read identification
Displays full identification if ECU control units, e.g part number, software/hardware version
3. Auto scan
Detect all ECU control units in the car and read diagnostic faults codes
4. Actuator test / customize settings
Activates particular actuators, like lock/unlock wheel, lock/unlock door, enable fuel pump etc
5. Programming functions
Lexia 3 is able to access multi-system, like engine, transmission, brake, airbag, immobilizer, body to proceed configuration programming
6. Measured values
Display live data, like engine speed, battery voltage, oxygen sensor, coolant temper,
7. Customize settings
Activate cruise control, disable DRL (daytime running lights), disable TPMS lights etc.
Tested vehicle models with Lexia 3 PP2000 diagbox
Citroen:
1995 Citroen XM 2.5 TD Norway
1998 Citroen XantiaⅡ2.0 16V Russia
1998 Citroen XM 2.0 TurboCT Portugal
2001 Citroen C5 HDi Portugal
2001 Citroen C5 2.0 HPi V16 Netherland
2001 Citroen Saxo 1.1 Finland
2001 Citroen 2.0 HDi 90hp Belarus
2001 Citroen 2.2 HDi Poland
2002 Citroen Evasion 2.0HDi RHW Belarus
2003 Citroen C3 1.4 Auto UK
2003 Citroen Xsara Picasso 1.8 16V Netherland
2003 Citroen Xsara Picasso 1.8 16V SX Finland
2004 Citroen Xsara 1.6 V16 110hp Belarus
2007 Citroen C5 2.0 HDi Hungary
2008 Citroen C3 1.4 Finland
2009 Citroen C4 1.6 THP Greece
2010 Citroen C4 HDi Argentina
Peugeot Planet 2000 for Peugeot:
1997 Peugeot 406 1.8i XU7JP4 Belarus
1998 Peugeot 106 Electric Norway
1999 Peugeot 406 2.0 HDi 90hp Belarus
2001 Peugeot 206 XR 1.6 V8 Argentina
2001 Peugeot 406 2.0 HDi 110hp Belarus
2001 Peugeot 406 2.2 HDi Finland
2001 Peugeot 607 2.2 HDi Diesel Ireland
2002 Peugeot 206 Petrol Russia
2002 Peugeot 307 2.0HDi Finland
2002 Peugeot 406 1.8i EW7J4 Belarus
2003 Peugeot 406 2.0 HDi 110hp Belarus
2003 Peugeot 307 1.6 XS Petrol Malaysia
2004 Peugeot 307 1.6 HDi SXI 56 UK
2005 Peugeot 307 2.0 HDi SW 100Kw V16 Austria
2006 Peugeot 407 2.0 HDi UK
2007 Peugeot 207 1.6 V16 Argentina
2007 Peugeot 307 1.6 Hdi Finland
2010 Peugeot 307 1.6 V16 Argentina
ALL the test results are based on Lexia 3 V45, the latest V48 adds more model possibility, especially Peugeot 307. Because V45 works week on Pug 307 module.
Lexia 3 PP2000 is popular auto diagnostic tool supporting most Citroen and Peugeot vehicles.The Newest Software is Lexia3 V47 PP2000 V25.Lexia-3 PP2000 has powerful function and support multi-languages.
Showing posts with label lexia3 download. Show all posts
Sunday, March 20, 2016
How to solve Citroen and Peugeot Lexia 3 PP2000 central locking problem
Vehicle example:
Peugeot 307 2.0 HDi 2005
Diagnostic equipment:
Lexia 3 Peugeot Planet PP2000 for Citroen and Peugeot OBDⅡdiagnostic interface
Problem:
New Pug 307 comes with one original key, so I have to make a new backup key. Got a blank key and got the key cut and programmed with lexia 3 PP2000 diagnostic software. Then I have two new keys that can start the car.
The problem is I can't get the central locking bit to sync (key fob stopped working). At first I doubted the IGN+ position (with engine ON or OFF at the same time). Soon I figured out that I should leave the ignition switch ON without starting the engine.
I got a good key programming document with PP2000 and followed it step by step:
How to program Peugeot new key with Lexia3 PP2000 diagnostic tool
I was stopped at the learning transponder key procedure. I search around Pug forums and finally got the answer.
Solution:
The problem lies on the lexia 3 PCB.
There are different types of PCB on the aftermarket:
1. Original keys which works fine
2. Copy keys sometimes PCB sometimes does not work
3. Second hand keys PCB can not be programmed again
Make sure you get the correct PCB, take this one on uobdii.com
1. Lexia-3 PCB edge is golden with original full chips. Double PCB has 7pcs optocouplers, which are 100% original and new.
2. lexia-3 relays are 12pcs, which are 4.5V, it is more stable.
3. PP2000 has 2pcs Optocouplers.
Peugeot 307 2.0 HDi 2005
Diagnostic equipment:
Lexia 3 Peugeot Planet PP2000 for Citroen and Peugeot OBDⅡdiagnostic interface
Problem:
New Pug 307 comes with one original key, so I have to make a new backup key. Got a blank key and got the key cut and programmed with lexia 3 PP2000 diagnostic software. Then I have two new keys that can start the car.
The problem is I can't get the central locking bit to sync (key fob stopped working). At first I doubted the IGN+ position (with engine ON or OFF at the same time). Soon I figured out that I should leave the ignition switch ON without starting the engine.
I got a good key programming document with PP2000 and followed it step by step:
How to program Peugeot new key with Lexia3 PP2000 diagnostic tool
I was stopped at the learning transponder key procedure. I search around Pug forums and finally got the answer.
Solution:
The problem lies on the lexia 3 PCB.
There are different types of PCB on the aftermarket:
1. Original keys which works fine
2. Copy keys sometimes PCB sometimes does not work
3. Second hand keys PCB can not be programmed again
Make sure you get the correct PCB, take this one on uobdii.com
1. Lexia-3 PCB edge is golden with original full chips. Double PCB has 7pcs optocouplers, which are 100% original and new.
2. lexia-3 relays are 12pcs, which are 4.5V, it is more stable.
3. PP2000 has 2pcs Optocouplers.
Saturday, March 19, 2016
How to disable Citroen DS3 DRLs with Lexia 3 Diagbox diagnostic tool
Lexia3 Diagbox is possible to erform various customize settings, disable day time running lights (DRLs) included. Latest Lexia3 V48 Diagbox V5.75 is available in eobd2.fr at a perfect price €65.
Here is the step-by-step guide of turning off DRLs with lexia 3 Diagbox diagnostic interface:
1. Install Lexia 3 Diagbox software
How to install Diagbox V7.57 for Lexia-3 PP2000 Citroen and Peugeot
2. Plug the lexia 3 diagnostic interface into the OBD socket
3. Select Citroen in Brand selection menu
4. Select vehicle model: DS3
Validate VIN (Check mark)
5. Select Diagbox application
6. Select Global Test
7. Select Diagnosis
8. Select Built-in System interface (BSI)
9. Scroll down to Vehicle Configuration, click OK
10. You will be able to view lists of customize settings, like hazard warning lamps, fog lamps day time running lamps etc.
Click Simultaneous illuminations of the day running lights and sides lights, change the status “yes” to “NO”
Daytime running lights are successfully disabled.
Lexia3 Diagbox is possible to erform various customize settings, disable day time running lights (DRLs) included. Latest Lexia3 V48 Diagbox V5.75 is available in eobd2.fr at a perfect price €65.
Here is the step-by-step guide of turning off DRLs with lexia 3 Diagbox diagnostic interface:
1. Install Lexia 3 Diagbox software
How to install Diagbox V7.57 for Lexia-3 PP2000 Citroen and Peugeot
2. Plug the lexia 3 diagnostic interface into the OBD socket
3. Select Citroen in Brand selection menu
4. Select vehicle model: DS3
Validate VIN (Check mark)
5. Select Diagbox application
6. Select Global Test
7. Select Diagnosis
8. Select Built-in System interface (BSI)
9. Scroll down to Vehicle Configuration, click OK
10. You will be able to view lists of customize settings, like hazard warning lamps, fog lamps day time running lamps etc.
Click Simultaneous illuminations of the day running lights and sides lights, change the status “yes” to “NO”
Daytime running lights are successfully disabled.
Friday, March 18, 2016
How to bleed brake for Citroen C5 with Lexia 3 Diagbox diagnostic tool
Equipment:
Lexia 3 V48 Diagbox V7.57 diagnostic interface
Install Lexia Diagbox software
Select Citroen in Brand selection menu
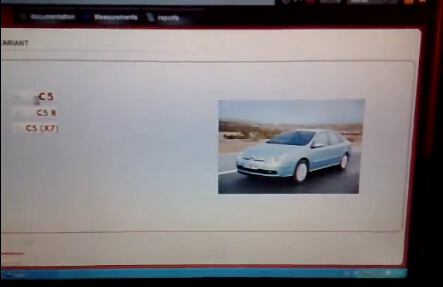
Select vehicle model: C5->C5
Click Tick mark to confirm ACTIVATION notice
Select application as LEXIA
Enter Activation code to activate
Back to APPLICATION menu and select second option
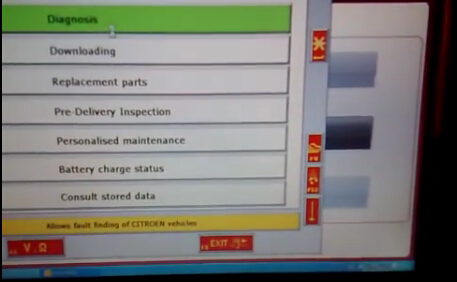
Select Diagnosis
Select Test by function
Switch off the ignition and switch it on again
Select driving aids (4th option)
Pull down the list and select road holding (ABS…)
The system is searching for the vehicle configuration
There are four options under road holding menu:
BSI
Instrument panel
Injection
Anti-lock brake system
Change Instrument panel, Injection and Anti-lock brake system to YES by click corresponding icons
Build communication with ECU
Accept Ecu ESP-MK60 Validate to continue
Accept the system pop-up message
Select “Bleeding” in next interface
Accept windows notice and follow the screen instructions
Bleeding Citroen C5 brake system procedure is complete
Lexia 3 V48 Diagbox V7.57 diagnostic interface
Install Lexia Diagbox software
Select Citroen in Brand selection menu
Select vehicle model: C5->C5
Click Tick mark to confirm ACTIVATION notice
Select application as LEXIA
Enter Activation code to activate
Back to APPLICATION menu and select second option
Select Diagnosis
Select Test by function
Switch off the ignition and switch it on again
Select driving aids (4th option)
Pull down the list and select road holding (ABS…)
The system is searching for the vehicle configuration
There are four options under road holding menu:
BSI
Instrument panel
Injection
Anti-lock brake system
Change Instrument panel, Injection and Anti-lock brake system to YES by click corresponding icons
Build communication with ECU
Accept Ecu ESP-MK60 Validate to continue
Accept the system pop-up message
Select “Bleeding” in next interface
Accept windows notice and follow the screen instructions
Bleeding Citroen C5 brake system procedure is complete
How to load Lexia 3 Peugeot Planet PP2000 diagnostic software to car ECU
Diagnostic tool needs:
Lexia 3 lexia-3 V48 diagnostic interface with Peugeot Planet PP2000 V25 diagnostic software
1.After well install and activate lexia 3 software, open and run Peugeot Planet Office on the desktop
2.Click F1 to key to cancel when the system pops out update warning message
3.Select vehicle model, here takes an example of 306R
4. Select application as Peugeot Planet 2000
5. Enter 4-digit Build code in Entering the vehicle information interface
NOTE:
Build Cod, also called RP or ORGA number for Citroens, is built in PSA Group factories. This can be used to determine the exact age of the vehicle (as opposed to date from registration info, which is all that RAC vehicle info etc. have to go on), as well as parts suitability - for instance where there was a changeover or variation during production you may see references such as “From O 8161” in the parts system. This is normally a 4 digit long number and identifies where the vehicle came in the production run.
To find the Build Code of vehicle, you need to look under the bonnet:
1) Earlier cars, the Build Code is painted (probably in green) onto the driver's side suspension turret. It is a 6 digit number, the first 4 digits of which are your Build Code.
2) In later cars the Build Code can be found on a small white sticker on the passenger side bulkhead.
If the build code is 09704 88 1 0759, then you put the number in Planet is 0970.
6. Then select ECU configuration and services
7. Select Global test
8. Switch on the ignition.
Connect the adaptor part number AC911684 ro the USB communication card (Peugeot Plant Interface)
Connect the portable to the test connector C001
9. Peugeot Planet PP2000 is successfully loaded to car ECU.
Lexia 3 lexia-3 V48 diagnostic interface with Peugeot Planet PP2000 V25 diagnostic software
1.After well install and activate lexia 3 software, open and run Peugeot Planet Office on the desktop
2.Click F1 to key to cancel when the system pops out update warning message
3.Select vehicle model, here takes an example of 306R
4. Select application as Peugeot Planet 2000
5. Enter 4-digit Build code in Entering the vehicle information interface
NOTE:
Build Cod, also called RP or ORGA number for Citroens, is built in PSA Group factories. This can be used to determine the exact age of the vehicle (as opposed to date from registration info, which is all that RAC vehicle info etc. have to go on), as well as parts suitability - for instance where there was a changeover or variation during production you may see references such as “From O 8161” in the parts system. This is normally a 4 digit long number and identifies where the vehicle came in the production run.
To find the Build Code of vehicle, you need to look under the bonnet:
1) Earlier cars, the Build Code is painted (probably in green) onto the driver's side suspension turret. It is a 6 digit number, the first 4 digits of which are your Build Code.
2) In later cars the Build Code can be found on a small white sticker on the passenger side bulkhead.
If the build code is 09704 88 1 0759, then you put the number in Planet is 0970.
6. Then select ECU configuration and services
7. Select Global test
8. Switch on the ignition.
Connect the adaptor part number AC911684 ro the USB communication card (Peugeot Plant Interface)
Connect the portable to the test connector C001
9. Peugeot Planet PP2000 is successfully loaded to car ECU.
Subscribe to:
Posts (Atom)